About Me

My photo
I am a wife to an awesome husband and a mom to 2 cute kids, 3 & 1. I love finding creative things to try, both with my 3 year old and on my own. It's hard to find time to be crafty between wife and mother duties, but when I find the time... it's a craftiful life! I hope some of the projects I write about will inspire you to have a craftiful life too!

Tuesday, November 13, 2012

2 Projects in 1 Post

OK, so I'm not usually one to jump from project to project.... but I must admit it did happen and it all goes back to Thanksgiving...

My husband's sister and her family had joined us for an awesome Thanksgiving weekend, full of eating, games, placing rocks (more on that later) and crafting!  The crafting bit was all thanks to my sister-in-law, and of course when shown the craft, well... I just couldn't resist.  So, we spent a bit of time painting and gluing, but you can read all about it on her blog.  It was quite a lot of work, but if you think about how much something like that would cost you in the stores... it's quite worth it!  We finished most of the project together, but then she had to head back home and I was left with a project half finished.  And it sat there for... well... let's just say there may have been a thin layer of dust on it.  Looking for some inspiration to finish the project, I started to peruse the internet hoping to find the inspiration that my S-I-L took with her, but instead I found my next project!

My inspiration for my second project was paper.  Scrapbook paper that I had to have!  And because of these wise old words: "You can never have enough paper", I bought the paper.   And it was a good thing I listened and bought that paper, as I may not have enjoyed this piece of wall art nearly as much!  Here's the finished product:


Following that project I realized I really needed to finish what I had started first... so here's my first project all finished and hung... my little girl loves it so I'm happy! :)  


Oh, and I just realized I haven't shown you the progression shots of the work we've done in my daughters room... so here it is:  
Watch the transformation and I'm sure you'll be amazed :)


Bright Yellow walls with swirly's


Half pink, Half Green: waiting for the molding to divide the colors


And this is what it looks like today!

Thanks for stopping by!  


Tuesday, August 7, 2012

Paving Stone Patio

This post is more for the family and friends who are interested... if you aren't family or a friend feel free to read on anyway!

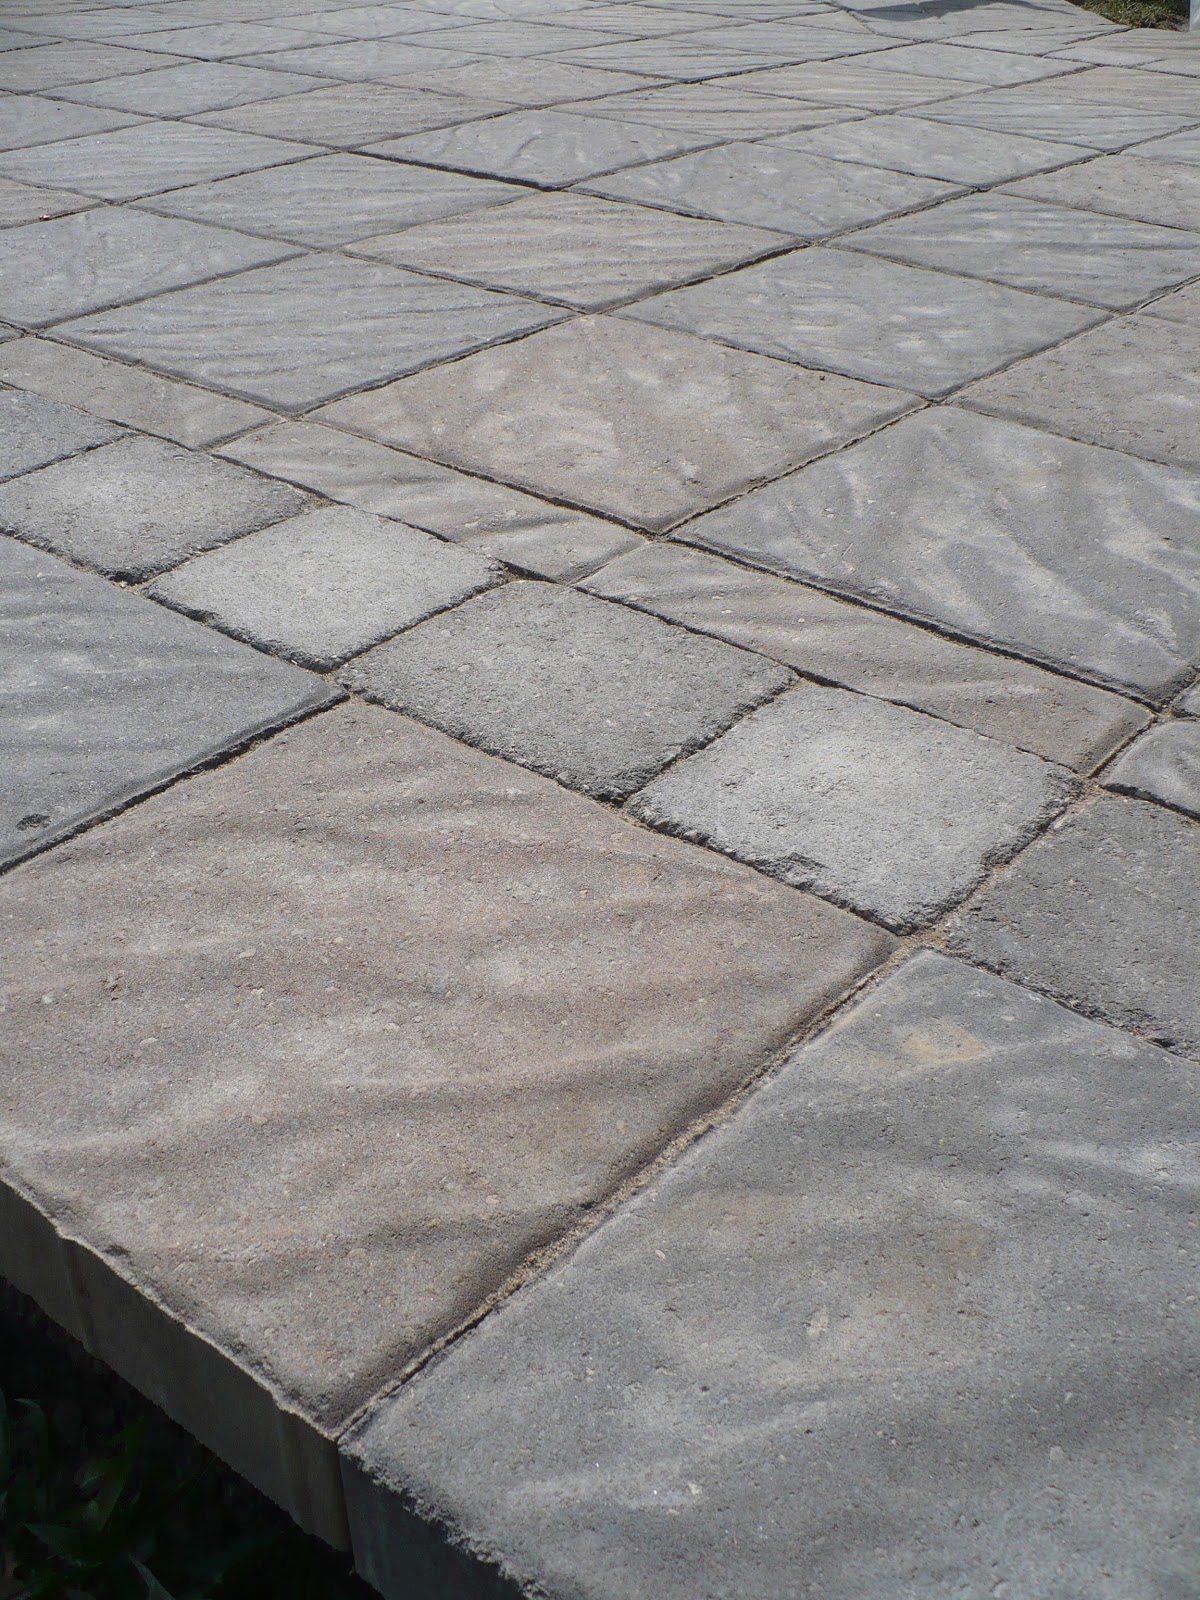
Well, I really can't take credit for the following project, but I just had to share it.  My husband did such an amazing job on it and I am so proud of Him!  After much contempation, our backyard patio finally became a reality AND it is now finished!  I won't say how long it took *COUamonthGH* but it is definitely well worth the wait.  And we even have some summer left to enjoy it! 

I sadly don't have a nice picture of the before but here's one that will give you an idea of what it looked like before:

   
Digging a hole...


Filling the hole... 


I think we're starting to look like the "crazy" neighbors on the block
First we piled all the dirt from the backyard hole along the side of the driveway and then received a truck and a half load of gravel a few days later.

Hole filled and leveled...


Walls and capstone finished...


After many hard days of work, the patio is finished...


Stairs back on...


Didn't he do such an amazing job??? 
If you'd like to leave some encouragement for him, I'll be sure to pass it on!


Monday, August 6, 2012

The Beach inspired Bathroom is Born!

So my creative juices have been targeting my new house lately. I know... may not be so exciting for some, but I am loving it and have been looking forward to this day for soooo long! As I mentioned in my previous post it just feels so great to know things are being accomplished a little at a time. SO my goal is to share these accomplishments as they happen. And guess what?! An accomplishment has happened this week! My Master Bathroom is finally finished (the first "room" complete)! 
We moved into a wonderland of "green". Every wall (for the exception of one room) was painted the same green. Not that I don't like green... it just wasn't right for MY house. :) So after many days of painting all the green is finally gone! (but more on that transformation later) Focusing on one room at a time here...

BEFORE:                                                                        AFTER:
(Green bathroom)                                                           (my lovely beach themed bathroom)


The walls were painted with some left-over paint from another room. Added a few touches to make it feel like a beach and I'm done the first room!
Thanks for reading my blog today! I hope to share more in the coming days/weeks so check back soon!

Thursday, July 26, 2012

A little Organization in My Life

Ok, so it's defnitely been a while, and I know you've all been wondering what's been going on?!  Well... since my last post, my family and I have moved!  And we now own a house!  As you can tell, I'm very excited about this as it's our first home AND we don't have to rent anymore!  yay!
This new home owning thing has brought us alot of new and exciting challenges though, which I'd love to share with you in the upcoming posts. 

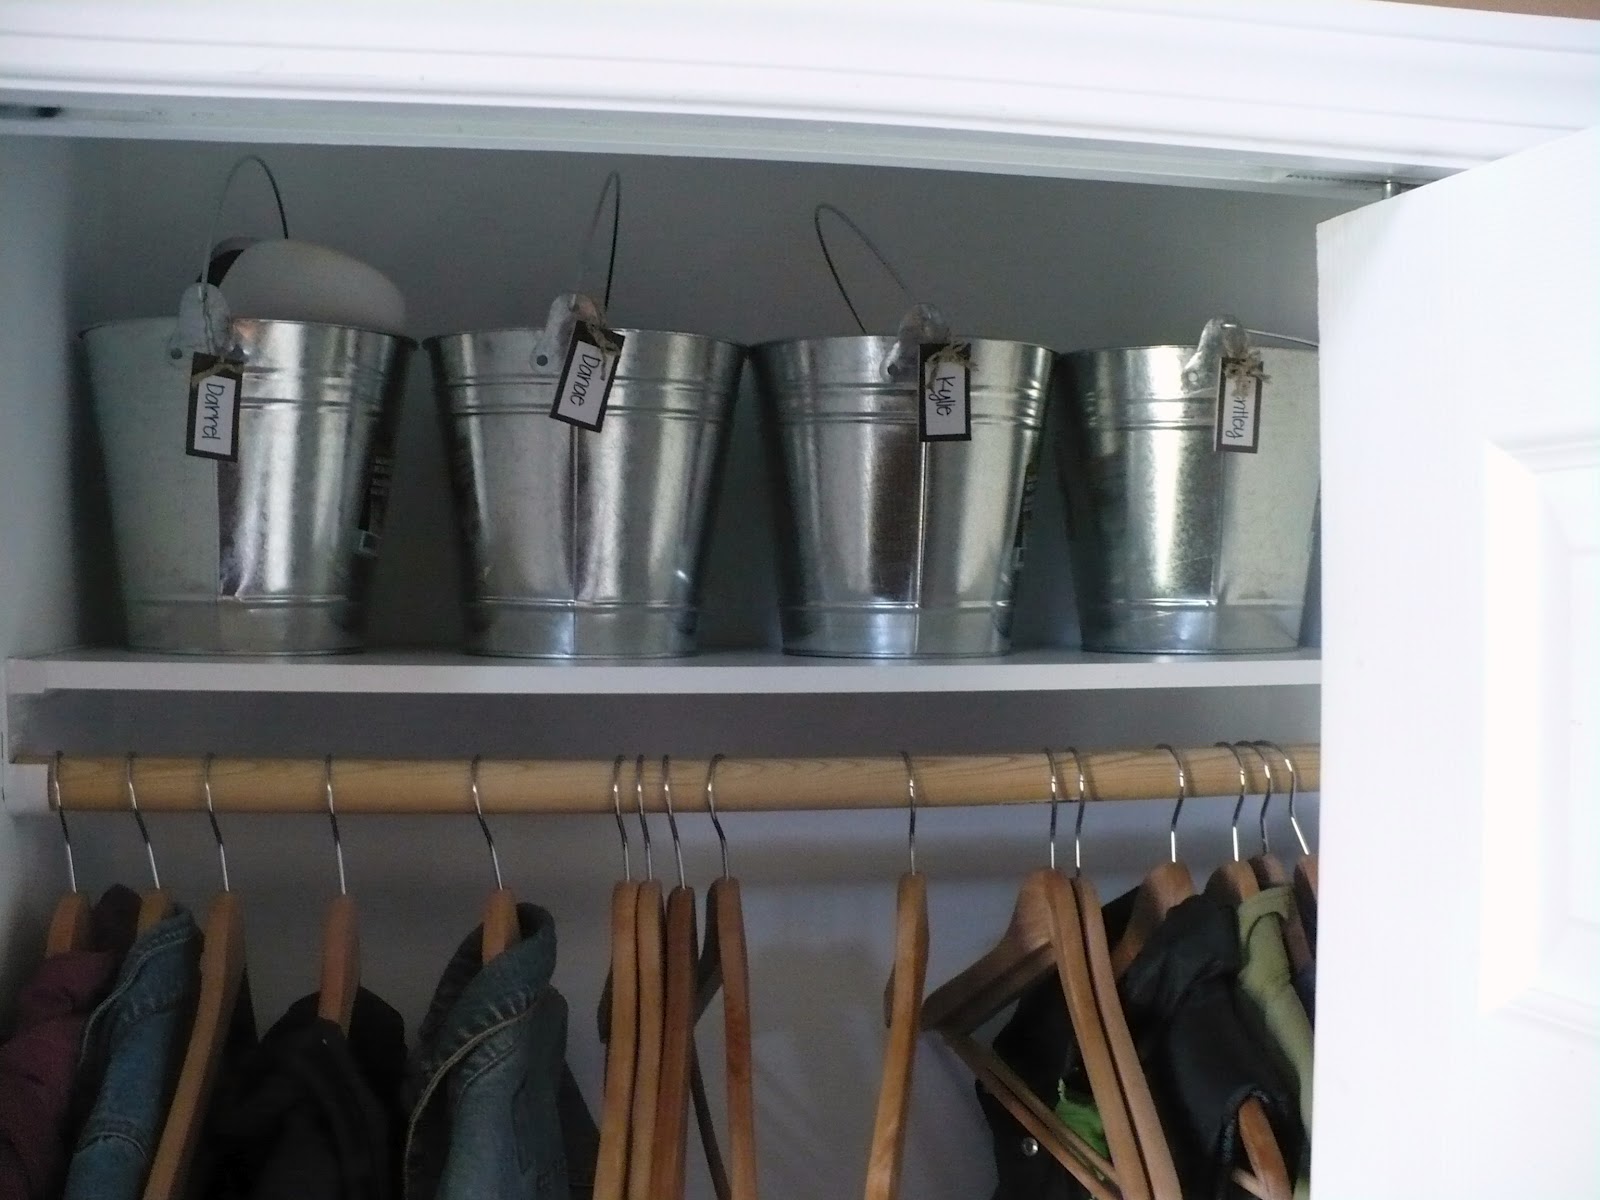
As I'm sure you all know, moving into a new place can take a while to get settled.  And even if everything else isn't quite in the right place yet, it's nice to know that there's one spot in your house that's "organized' and "finished".  This spot for me happens to be my front closet.  :)  I bought 4 buckets from Dollarama, made some tags for each of them, and BAM. Organized.  


    I thought I'd share it with you because it's the first place in my house that I can say is "finished!".

Friday, April 20, 2012

A nice splash of color

I had seen some old baby receiving blankets on our local buy and sell webpage and wondered what I could make out of them... after looking online for some ideas I came across this how to on braided rugs. 

So I got those old receiving blankets and started ripping them up!  I eventually decided the rug would go nicely infront of my washer & dryer. 

I would, however, like to warn you of two things before you try and attempt this project.  1. Make sure it's not too big a rug.  I measured the rug out to go infront of my washer and dryer but realized the space was a bit bigger than I first thought.  2. make sure you have the time!  I quickly found myself braiding and hand-stitching for a good week or two, but I think it was worth the work because I'm so proud of how it looks!  Definitely a nice splash of color to my dark and dreary laundry/storage room.

And now... I know you've been dying to see how it turned out... 


Thursday, April 5, 2012

Easter Time

Seeing as how Easter is this weekend, I've been trying to do different Easter related crafts with my daughter this week.  We ended up painting Easter things (because painting is her favorite). 


I was trying to come up with some different fun crafts when my M-I-L sent me this great idea for Easter Baskets.  The baskets were a bit tricky for my 3 year old daughter, so I went in on this one alone.  I think they turned out really cute. 


The website I referred to above has a great tutorial if your interested in making them.  The only thing I did different was I actually used the plastic container to create a more sturdier basket.  I just cut off the lip of the containter and taped the paper to the inside of the plastic container. 

I think the kids are going to love using them while they hunt for their Easter surprises!


Monday, March 5, 2012

Clipboard Photo Frame

I finally finished a project that's been in the works since last September, when we got back from Disneyworld.  Kylie's bedroom walls are still looking a little bare, so I've been looking for some fun ways to put photos up in her room.  I finally finished the project (idea taken from a book I have) and I've put it up low enough so she can enjoy it.  Already I'm hearing her talk lots about it :)

100 acre wood Birthday Party!

My little baby boy is 1 year old now!  It's amazing how fast a year goes by... and now I am left thinking... where did the time go???  It feels like only yesterday we were holding this little baby...


And now we are lucky, if he sits long enough, to hold this guy...


I didn't do a whole lot for his party, we just had a few friends over during the day and our family for supper and cupcakes (oh and skype is such a great thing! our parents were able to join in watching our little guy blow out his first candle)  I went with a Winnie the Pooh theme, so I tried to transform our kitchen into the 100 acre wood... using plastic green table clothes to look like trees... if anything, our little 2 year old loved it.  :)


And the cupcakes were transformed into bumble bees


And our little boy was transformed into a... mess :)


It was a great day to celebrate the birth of this special little boy! 


Monday, October 31, 2011

Disney Princess Masquerade Masks

Lately, I've been trying to be more diligent in having craft time with my little girl.  So, I was trying to find some fun crafts to do with her, when I came across Disney family.com

This is my new favorite website! 

I love the ideas and different craft projects for kids.  Most of the crafts are for an older audience, but I did find these princess masks on the website and thought it would be easy enough for my toddler to decorate. 

She loved it!  Loved the sparkly glue mostly...


I think they turned out really cute!


This picture makes me laugh, but don't we all look like such pretty princesses?? 


Love n Nature

After searching for a while, I finally found some cute bedding for my little girl's room!!  I found it at Target and on sale no less!  The colors are great and the owls are just so cute!  The only downside is we only bought one curtain panel to match the set and now those curtains are nowhere to be found in stores... I'm still trying to come up with a plan to find another one.

Here's a little peek at her room:


There was a wall hanging that matched perfectly in stores, but alas I didn't buy it.  I started to regret that decision until I saw a cricut cartridge called Hoot 'n' Holler, which is filled with owls that looked alot like the owls on the bedding.  So I got to work and made my own wall hanging... again. :)  Seems I'm doing alot of this...  Anyway, the finished product looks great and matches perfectly!  


Wednesday, September 28, 2011

The DIY projects begin...

For those who don't know, we have once again packed up the moving truck and moved even further north!  In doing so, I have lost my beautiful home, or should I say scrapbook area...  So lately most of my crafting energy has been channeled into the house, however, I have managed to squeeze in some time to create a few scrapbook pages of our recent trip to Disneyland!

Our new home definitely has potential, it's just tackling this 1970's home can be a bit daunting.  I was really shocked to see the kitchen (yes we moved into this place without seeing it)... small and very outdated, but so far we've changed the hardware on the kitchen cupboards, reapplied the caulking around the tiles, and changed the electrical outlets from ivory to white and surprisingly  it has made a difference in how I feel about it. 

Our big project has been the basement.  An unfinished, cold, mess is hopefully going to turn into something a little more bareable and even useable!  The outside of the basement was all drywalled, thankfully!  So we (and if my husband was reading this he would say HE) put up the drywall down the middle wall.  So far mudding isn't going fast enough...  I can hardly wait to paint!

Before


After (with drywall)


If you would like to help me out... I need some paint ideas.  There are two windows in this room so there is some light down there, but it would still be nice to paint it something to brighten it up.  Any ideas??

Thanks for stopping by!

Tuesday, July 26, 2011

Remembering Our Vows

We are coming up on our 4th wedding anniversary and I still had yet to put up wedding photos. 
So, I decided my project for the day would be to get creative and get those wedding photos up!  I found this neat project in a book I bought and thought I'd try it out.

I'm not quite sure if they will stay this way, or if after looking at it everyday will cause me to do a revision.  But for now, I'm satisfied. 


I took two canvases and covered them with fabric I liked.


Took three cheap, light silver photo frames and stuck them on with tape. (might need a little glue depending on how heavy the frame is)


Added some ribbon and paper flowers with brads.


Typed out our vows and a song that was sung on our wedding.

Now we have no excuse remembering what we promised each other that day...

Tuesday, July 5, 2011

Redesigned Clock

I usually love a good before/after blog, but unfortunately I can't find a before picture of my newly redesigned clock. So, instead of showing the before picture, I'll tell you the story of how it all happened... 

One afternoon I was sitting in my craft room having a bit of scrappers block (you know... writters block, only for scrapbookers), when I started to look to my black and white clock for inspiration.

After what seemed like hours of staring and listening to the tick tick tick of the clock, inspiration came!!! But it wasn't for my scrapbook page, instead it was for the clock.  I imediately took the clock off the wall to see if it would come apart nicely... and to my exitement it did!

I cut a circle out of white paper for the background, added some paper flowers and buttons, and cut the numbers using my Alphalicious cricut cartridge. 

Now it's back on the wall; and I am now staring at a pretty clock still waiting for inspiration...


Sunday, June 19, 2011

My Babies

My Babies.. trying to remember what it was like when they were first born is hard sometimes. 
Time flies by... and things get forgotten. 
Hopefully these pictures will help me to remember to enjoy every minute I have with them.


Of course it's Jungle themed!